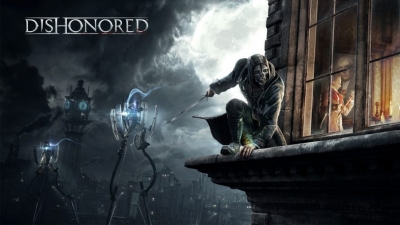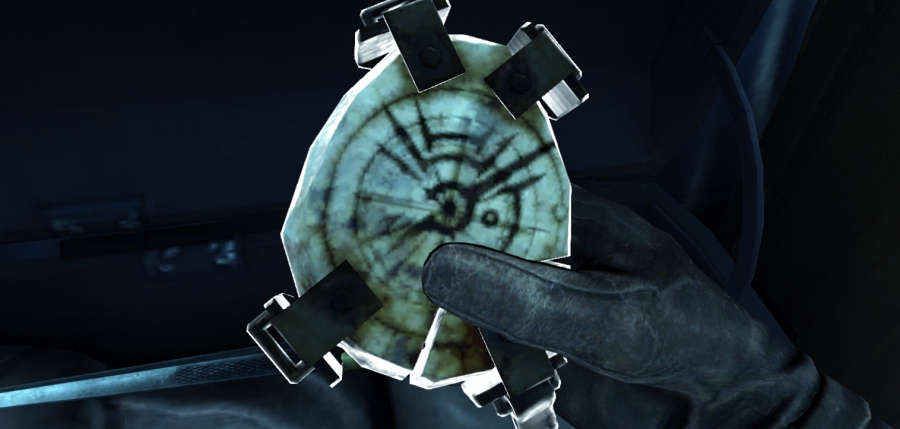
While the game follows most rules of an RPG genre it offers, you to level up the protagonist and upgrade his abilities. Corvo Attano, as well as heroes of different DLCs, can use runes to learn and boost supernatural abilities. Runes are ancient signs made originally made by powerful civilization. However, people also make runes nowadays using for this goal bones of whales. Many runes are related to the Outsider and can be received from this creature.
Here we will describe runes’ locations in the original game and DLCs for it. Note that there are only 39 runes in the game, but 58 runes are required for maximizing every skill. Respectively, there are 30 available and 46 needed runes in DLCs. Means you should carefully invest runes because it’s impossible to upgrade every skill to the maximum. We suggest detecting every rune with your Heart as these items are very valuable.
Let’s start with the original game.
Before and between missions – main game
When starting mission doesn’t contain runes at all you can find several items before the second quest. As you have arrived at the Hound Pits get some sleep. The Outsider in your dream that is actually the Void will award you with his mark and first rune. After the first meeting with this creature, another rune will also be available in the workshop of Piero Jolpin. Note that new runes at a price of 500 coins will appear in the store after each dialogue with the Outsider.
There are also new runes between second and third missions. Explore the sewer under the pub and look for a gate with two weepers. One rune is in the chest guarded by enemies and another one is right there, but underwater.
Between fifth and sixth missions you also can achieve several objects. One of them is located in your room if you didn’t kill at least one of Boyle sisters. The second item is a reward for a duel with Lord Shaw. Finally, the last rune is kept by Emily. Find her with Dark Vision.
Mission 2 – main game
Before the beginning seeks for the third rune near the pub. Try to activate the Heart to reveal a correct place and cast Blink to teleport there.
In this quest, you can acquire up to 7 runes:
- Complete first side quest of Granny Rags;
- Finish the second side quest of Granny Rags;
- Find an Outsider Shrine behind the home of Granny Rags;
- Open the guard building after passing further Wall of Light;
- Look for a picture in the meeting hall once you are inside the office;
- Find a secret place in the kennel that you can access before meeting with Samuel;
- Enter the workshop in the Back Yard with a stolen key or through its roof.
Mission 3 – main game
This mission offers you 5 runes in different places. Some of them are difficult to find so use our guide:
- Enter the secret lab of Doctor Galvani and find a new rune right at the place from the mission 2;
- Rise to the second floor of building in front of the Golden Cat. You may use Blink;
- Also, explore the second floor of the Golden Cat and look for a picture frame in the foyer;
- Explore the bedrooms to find additional rune near Emily’s location;
- Enter the apartments of Artist and unlock the chest on the upper floor. The correct combo is 8-7-9, but you can reveal it by electroshocking the Artist in the brothel.
Mission 4 – main game
Next mission will award you with 5 runes, but you should explore many locations attentively. Here are all runes which are available:
- In the blocked house near the railway. Cast Blink to get to the balcony or just shot the blocked door. Search for this rune on the top floor.
- In the home of Pratchett which you can unlock by stealing his key or killing the owner. Next rune is in the safe with combo 4-7-3 which can be revealed by paintings.
- In the building near your previous location where you should immobilize or kill screaming madman. An Outsider Shrine is your goal.
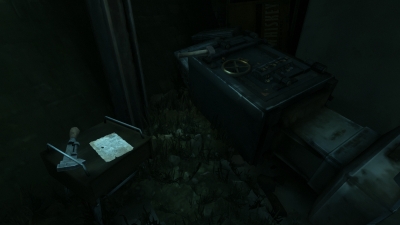
- On the desk inside the substation. It’s a part of the main quest so you will not miss it.
- In the mansion of Sokolov in his laboratory on the top floor.
Mission 5 – main game
Here are only 3 runes and you should try to find them all. From now these items become even more valuable as you have to level up skills:
- Firstly go to the infested building with the red wall. Find an Outsider Shrine at the top.
- Dive in the water at the end of this river. Or use stairs near the metal bridge there.
- Enter the underground hidden vault in the mansion of Boyle. Open it with stolen from Lydia key or crawl inside in a rat form.
Mission 6 – main game
It’s possible to find 4 runes during this quest. Here is located one Outsider Shrine as well. To reveal all runes you should:
- Enter the small house to the right of the tower. Beware of central turret and Tallboys.
- Find a key for a bedroom of Lord Regent and go there. You want to find the footchest.
- Come down to the room of tortures and locate an Outsider Shrine.
- Reach the last floor of the tower and go to a safe room there. Disable the Wall of Light and Tallboy as well as other enemies to grab the last rune here.
Mission 7 – main game
5 runes wait for you here. It’s the last chance to get such amount of valuables so far as last missions offer only one rune each:
- Once you get your items backspin a wheel to open the door outside. The first rune is in the swamps, but there are many river crusts so use a grenade to clean the way.
- Get the Daud’s key and open locked door near the hideout. Collect next rune below.
- Blink toward the train to see apartments with several windows. Rise to the roof where your loot is.
- Explore the new home of Granny Rags and reveal an Outsider Shrine inside. You have to help Granny to kill Slackjaw to find this secret room.
- Come back to the sewer where a camp of survivors or enemies is located. Open the gate with the universal key and come down to collect the last rune.
Mission 8 – main game
This mission contains only one rune. Come back to the pub and explore the workshop of Piero. You may use walkways from apartments of Callista as well as from your own rooms. Desirable rune is on the second floor.
Mission 9 – main game
During the last quest, you also will find only one rune. Choose a stealthy way and find the Gatehouse Drainage in the sewer. You can simply follow the marker or explore the whole dungeon. Be sure to pass through maintenance room.
Mission 1 – DLC 1
DLCs also include runes which you can find with our help. The first quest offers you 6 items of this type:
- A free gift at the start of the first mission;
- An item above the entrance to the slaughterhouse;
- An item at the top of the slaughterhouse in a hidden alcove;
- An item in the tunnel between rooms is available with favor purchased at the start;
- An item in the harvesting hall near the electrical switch on the desk;
- An almost free gift which you will receive during the quest of Granny Rags.
Mission 2 – DLC 1
7 runes can be looted during the second mission in certain locations:
- Under the bridge near the first entry. Note that this rune is available only with favor purchased;
- In the warehouse near district gate;
- In the neglected room number 7 behind a picture;
- In the room number 10 behind a bookshelf;
- In the estate near Delilah’s monument;
- In the locked chest which can be opened with the key of Timsh.
The last rune can be obtained by completing a ritual of Granny Rags. Use a tarot card with an Outsider Shrine in room number 10. Then go to the upper floor of the estate and burn this card. Voila!
Mission 3 – DLC 1
Last items are located in the final location. The first item is at the top of the hideout in the room with Hume. You must loot the Daud’s key to open the chest with the first rune. The second item is in the building near hideout in an unlocked box.
Prologue – DLC 2
An introduction includes the easiest to collect runes. The first one you will receive automatically as well as equipment at the beginning of the game. The second one is on the bookshelf outside the main hall in headquarters. It’s easy to collect this rune after assassins’ dialogue to the left of their location.
Mission 1 – DLC 2
The first quest also includes several runes. For one of them, you have to purchase favor before the beginning. This rune can be obtained on the river bed near the exit of the sewer and big metal combination. The second item is hidden in the Interrogation Room where you should look for a dark part with desk.
Mission 2 – DLC 2
Here are a lot of runes and we want to describe all of them:
- The apartments of a mechanic after completing side quest of Granny;
- Dry river near the sewer after purchasing favor;
- The wall near the entry in the studio of the Dressmaker;
- Top of the cargo box in docks;
- Destroyed basement in the guard building;
- Office in the warehouse;
- Ventilation room with an Outsider Shrine.
Mission 3 – DLC 2
Last runes can be found near the end of the game. It’s quite easy to find all of them with our guide:
- Strange building near the river at the beginning. This rune requires favor.
- Unlocked chest to the right of the mansion partially flooded.
- An abandoned house in the backyard after completing another side quest of Granny.
- At the top of the estate in the room with many chests.
That’s all possible runes both in the original game and its DLCs. Try to find them all!